


Introduction
Improving the CPU in your PC can wake up a tired old system with revitalized performance, so you will get a better computing experience overall. An upgrade could reference improvement in the sluggish performance of applications, upgrades for better multitasking, or simply improve your system performance for more demanding needs. An increase from your current CPU to a new Intel Core i5 CPU can be a worthwhile upgrade.
Within this guide, we will walk you through some of the prerequisites for upgrading to an Intel Core i5 processor on your PC, laptop and mini PC, and what to expect so your decisions and preps will enhance the upgrade experience.
Preliminary Steps for Intel i5 Processor Upgrade
1. Understanding Processor Upgrade Needs
Before entertaining a processor upgrade you’ll want to assess whether you do need to upgrade. You typically will need to upgrade if your current system is having trouble keeping up with your existing workload, what software requires, or your gaming needs. Symptoms of your system indicating a need to upgrade include:
- Slow Performance: Applications take longer to open, and tasks take longer to complete.
- Poor Multitasking: Your system slows down significantly when multiple applications are open.
- Software Incompatibility: New software or updates cannot run because they require more processing power.
Being aware of these problems may help you decide if a processor upgrade will fix your problem and ascertain whether you would be better served with an upgrade, for example, additional RAM or an SSD upgrade.
2. Compatibility Checks
Because the specific motherboard socket type and chipset compatibility can vary, upgrading to a processor upgrade isn’t necessarily a straightforward process. For example, different variants of the Intel Core i5 processor class require different sockets, specifically LGA 1151 or LGA 1200—this socket type (and thus compatibility) can be checked in applications like CPU-Z and by examining the “Mainboard” tab.
Additionally, the motherboard chipset, even if the processor socket type were to be compatible, would also need to support the architecture of your chosen processor type. Again, this can be appraised by looking at the specifications on the manufacturer’s webpage.
Finally, don’t forget to look for any BIOS updates that may be needed for compatibility.
3. Backup and Data Security
Before any hardware upgrades, you want to ensure that you have enough backup of your data, ideally a complete system image. This means either plugging in an external drive or using imaging software, like EaseUS Todo Backup or Acronis True Image, to create an image of your system. Ideally, after the image has been created, you will want this image stored in as many locations as reasonable, this includes both an external drive and a cloud storage location, to increase the chances of your not losing your files during the upgrade process.
With these preliminary steps, you will be prepared to do a successful processor upgrade, all while minimizing risk to yourself and your system in preparation for your new Intel Core i5. The next section will guide you through choosing an appropriate processor, upgrading the processor itself, and ensuring that your new build runs smoothly upon completion.
Choosing the Right i5 Series Processor
Upgrading to a new Intel Core i5 processor means more than simply finding the latest processor to upgrade. You’ll want to consider your system requirements, what processor is compatible with those requirements, and your budget. Here’s a guideline to get you started in choosing the right processor for your upgrade:
Selecting a Compatible Processor
When choosing an Intel Core i5 for your system, keep in mind your specific needs. Characteristics like generation, thermal design power (TDP), and performance relative to your task should inform your choice.
For example, if your motherboard can accommodate 8th-generation processors, an i5 from that generation would be the best choice. Finally, make sure your cooling system can handle the TDP of the new processor and avoid overheating.
How to install the i5 CPU
Upgrading your processor is a precise and intricate task that needs careful consideration and accuracy. Here’s an easy-to-follow process to guide you through the installation.
Safety Precautions
- Ensure you are working in a static-free environment by using an anti-static wrist strap or ensuring you are grounded.
General Disassembly Instructions
Laptops
- Power Down and Disconnect:
- Ensure the laptop is completely powered off and disconnected from all power sources.
- Remove the Battery (if applicable):
- Remove the battery to prevent any electrical issues.
- Open the Back Panel:
- Unscrew the necessary parts to access the internal components.
Desktop PCs
- Power Down and Disconnect:
- Turn off the PC and unplug all cables.
- Open the Side Panel:
- Remove the screws or slide off the side panel to access the motherboard.
Mini PCs
- Power Down and Disconnect:
- Ensure the mini PC is powered off and all cables are disconnected.
- Access Internal Components:
- Depending on the model, remove screws or covers to open the mini PC.
Replacing the Processor
Common Steps for All Devices
- Remove the Old Processor:
- Locate the CPU socket and carefully unlock it (if applicable).
- Gently lift the old processor out, ensuring not to bend any socket pins.
- Install the New Processor:
- Align the new processor with the socket, noting the orientation indicated by a small triangle on one corner.
- Place the processor gently into the socket without applying excessive force.
- Secure the socket lever.
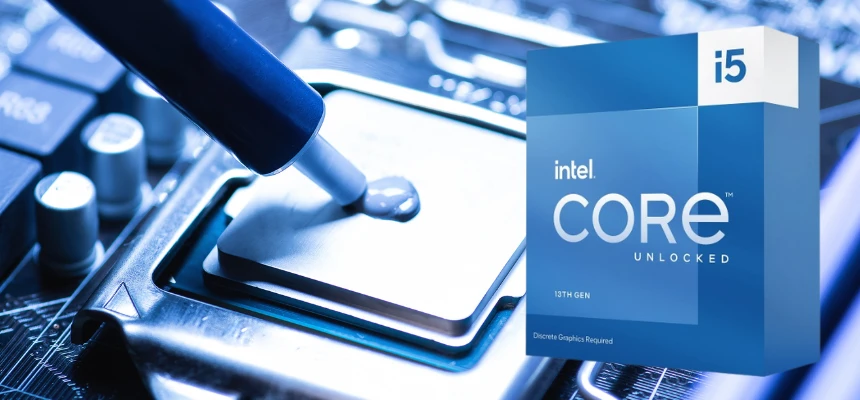
Applying Thermal Paste
- Apply a small pea-sized amount of thermal paste to the centre of the processor. This ensures effective heat transfer from the CPU to the cooler.
Reattaching the Cooler
- Position the cooler back on top of the CPU and secure it according to the manufacturer’s instructions.
- Make sure the cooler is firmly in place to prevent overheating.
Reassembly and Testing
Laptops
- Reassemble:
- Reverse the disassembly steps to put your laptop back together.
- Power Up and Enter BIOS:
- Verify the new processor is recognized and check for any system errors.
Desktop PCs
- Reassemble:
- Replace the side panel and secure it with screws.
- Power Up and Check System:
- Enter the BIOS to ensure the new processor is functioning properly.
Mini PCs
- Reassemble:
- Replace any covers or screws removed during disassembly.
- Power On and Monitor:
- Check BIOS settings and monitor system stability and temperature.
Post-Installation
Upon successfully installing your new Intel Core i5 processor, the first step is to ensure that everything is functioning properly and that your PC is performing to its full potential.
Using Diagnostic Tools
Once you’ve successfully changed your processor, you will want to check that everything works the way it’s supposed to. Below are some diagnostic checks you can perform:
Inspect the System BIOS: Immediately after installing your new processor, go into your system’s BIOS. Make sure that the new processor is recognized, and that every value is set correctly. This is also a good time to ensure that the system recognizes all hardware correctly.
Windows System Information: In Windows, you can check the details of your new processor quickly and easily by clicking through the menu to Settings > System > About. In this list, you will see the processor details as you expect, confirming that the CPU was successfully upgraded.
CPU-Z: This is an option that gives you more detailed CPU information. It will show everything about your CPU (including name, number, codename, process, package, and all sorts of other things). This is useful to ensure that the operating system is properly utilizing the CPU upgrade to its fullest.
Stress Testing: It is possible to use stress testing software, like Prime95 or AIDA64, to ensure your newly installed CPU to see if it checks out in a stress test. Stress tests allow you to run a reliability or stability check under load to help determine if your computer will service needs under heavy load conditions. Monitor temps and performance to ensure your system is not overheating.
Maintaining Your Upgraded System
To maintain the performance of your upgraded system over time, it is extremely important to monitor its upkeep:
- Thermal Management: Regularly clean out dust from air vents and cooling fans to prevent overheating. Consider applying new thermal paste annually if you notice temperature spikes.
- Software Updates: Keep your operating system and all drivers up to date. This not only improves security but also ensures compatibility and optimal performance.
- Hardware Checks: Periodically check the physical condition of your laptop, especially if you frequently disassemble it for upgrades or maintenance. Ensure all components are secure and that there is no damage from overheating.
Conclusion
Once your system gets upgraded to an Intel Core i5 processor, you will notice fantastic performance benefits, making it a great investment for anyone looking to enhance their system. If the upgrade process is done with thoughtfulness, from prep checks before starting, through the process of upgrading, to the maintenance testing process after installation, you will have updated a system that can consider your computing needs.